RemoteIoT Platform Free Raspberry Pi: Your Ultimate Guide To Building IoT Projects
Building IoT projects has never been easier with the rise of remote IoT platforms and Raspberry Pi. If you're looking for a free, reliable, and user-friendly solution to kickstart your IoT journey, you're in the right place. In this guide, we'll dive deep into everything you need to know about remote IoT platforms and how Raspberry Pi fits perfectly into the equation. Whether you're a beginner or a seasoned pro, this article has got you covered.
Imagine a world where you can control your home appliances, monitor environmental conditions, or even automate entire systems with just a few lines of code. That's the power of IoT (Internet of Things). But here's the kicker—what if you could do all of this without breaking the bank? Enter the realm of free remote IoT platforms and Raspberry Pi. It's like having a Swiss Army knife for tech enthusiasts.
Now, before we jump into the nitty-gritty, let's set the stage. This guide isn't just another tech tutorial. We're going to break down complex concepts into bite-sized chunks, ensuring that even a complete newbie can follow along. By the end of this article, you'll have the tools, knowledge, and confidence to build your very own IoT projects. So, grab your favorite beverage, sit back, and let's dive in!
Read also:Ballistics And Document Analysis Crossword The Ultimate Guide For Puzzle Enthusiasts
But wait—why Raspberry Pi? Why remote IoT platforms? And most importantly, why should you care? Stick around, and we'll answer all these questions and more. Let's get started!
What Exactly is a RemoteIoT Platform?
Alright, let's start with the basics. A remote IoT platform is essentially a software solution that allows you to connect, monitor, and control devices over the internet. Think of it as the brain behind your IoT projects. It handles everything from data collection to device management, all in one place.
Now, here's the cool part—these platforms are often cloud-based, meaning you don't need expensive hardware or complex setups. All you need is an internet connection, and boom—you're good to go. Some platforms even offer free tiers, making them accessible to hobbyists and small-scale developers.
Here's a quick rundown of what a remote IoT platform can do for you:
- Device management: Add, remove, or update devices with ease.
- Data visualization: View real-time data through dashboards and charts.
- Automation: Set up rules and triggers to automate your workflows.
- Security: Protect your devices and data with built-in security features.
And guess what? Many of these platforms are designed to work seamlessly with Raspberry Pi, making it the perfect combo for your IoT projects. But more on that later!
Why Choose a Free RemoteIoT Platform?
Let's face it—starting an IoT project can be expensive. From purchasing hardware to subscribing to premium services, the costs can add up quickly. That's where free remote IoT platforms come in. They offer a cost-effective way to experiment, learn, and even deploy small-scale projects without burning a hole in your wallet.
Read also:Lawmakers Urge Feds To Exonerate Hero Cop Who Unwittingly Spied For The Chinese Lost Everything Never Wavered
But don't let the "free" label fool you. These platforms are packed with features that rival their paid counterparts. Plus, they often come with active communities and extensive documentation, ensuring you're never stuck when troubleshooting.
Raspberry Pi: The Heart of Your IoT Projects
Now that we've covered remote IoT platforms, let's talk about the star of the show—Raspberry Pi. This tiny yet powerful device has revolutionized the world of IoT. It's basically a mini computer that you can use to run your IoT applications, connect sensors, and interact with the physical world.
Here's why Raspberry Pi is such a game-changer:
- Affordable: You can get one for as little as $35.
- Versatile: It supports a wide range of programming languages and operating systems.
- Community-driven: Thousands of developers contribute to its ecosystem, providing tutorials, libraries, and support.
- Compact: Its small form factor makes it ideal for portable and embedded projects.
But here's the real magic—when you combine Raspberry Pi with a remote IoT platform, you unlock a world of possibilities. From smart home automation to industrial monitoring, the sky's the limit!
Setting Up Raspberry Pi for IoT
Before you can start building your IoT projects, you'll need to set up your Raspberry Pi. Don't worry—it's easier than it sounds. Here's a step-by-step guide to get you started:
- Install an operating system: Raspbian is a great choice for beginners.
- Connect to Wi-Fi: Make sure your Pi is connected to the internet.
- Update your system: Run
sudo apt updateandsudo apt upgradeto ensure everything is up to date. - Install necessary libraries: Depending on your project, you might need to install additional packages.
And there you have it—a fully functional Raspberry Pi ready for your IoT adventures!
Integrating Raspberry Pi with RemoteIoT Platforms
Now comes the fun part—integrating Raspberry Pi with a remote IoT platform. This is where the magic happens. By connecting your Pi to a cloud-based platform, you can access your devices from anywhere in the world, monitor real-time data, and even control them remotely.
Here are some popular remote IoT platforms that work well with Raspberry Pi:
- Adafruit IO
- ThingsBoard
- Losant
- Blynk
Each platform has its own strengths, so it's worth exploring a few to see which one suits your needs best. For example, Adafruit IO is great for beginners, while ThingsBoard offers advanced features for more complex projects.
Step-by-Step Integration Guide
Let's walk through a basic integration process using Adafruit IO as an example:
- Create an account on Adafruit IO.
- Set up a new feed to collect data from your Raspberry Pi.
- Install the Adafruit IO Python library on your Pi.
- Write a simple script to send data to the feed.
- View your data in real-time on the Adafruit IO dashboard.
That's it! You've successfully integrated your Raspberry Pi with a remote IoT platform. Now, let's explore some project ideas to put your new skills to the test.
Project Ideas for RemoteIoT and Raspberry Pi
The beauty of IoT is that the possibilities are endless. Here are a few project ideas to inspire you:
- Smart home automation: Control lights, thermostats, and security systems remotely.
- Environmental monitoring: Measure temperature, humidity, and air quality in real-time.
- Agricultural solutions: Monitor soil moisture and automate irrigation systems.
- Healthcare applications: Track vital signs and send alerts in case of emergencies.
Remember, the key to a successful project is to start small and build from there. Even the simplest projects can teach you valuable skills and lead to bigger, more complex systems.
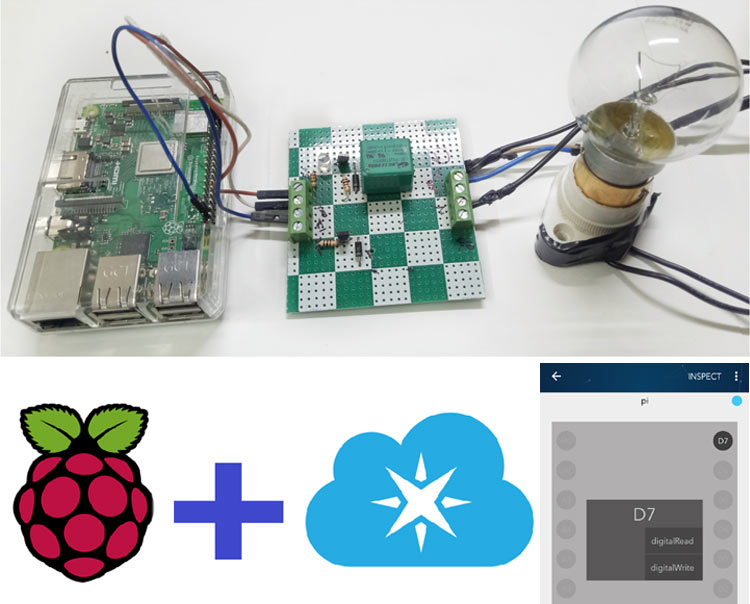
Building a Smart Home Automation System
Let's take a closer look at one of the most popular IoT applications—smart home automation. With Raspberry Pi and a remote IoT platform, you can create a system that allows you to control your home devices from anywhere in the world.
Here's how you can do it:
- Connect your Raspberry Pi to a relay module.
- Wire the relay to the devices you want to control.
- Write a script to toggle the relay based on user input or scheduled events.
- Integrate the script with your remote IoT platform for remote access.
Voilà! You've just built your very own smart home automation system. Now, wasn't that easy?
Troubleshooting Common Issues
No matter how experienced you are, you're bound to run into a few hiccups along the way. Here are some common issues and how to fix them:
- Connection problems: Make sure your Raspberry Pi is connected to the internet and the platform's API keys are correctly configured.
- Data not updating: Check your script for errors and ensure the platform's feed is properly set up.
- Device not responding: Verify that all hardware connections are secure and the device is powered on.
Still stuck? Don't worry—there's a vibrant community of IoT enthusiasts ready to help. Just hop on to forums like Reddit or Stack Overflow, and you'll find plenty of advice and solutions.
Best Practices for IoT Projects
To ensure your projects run smoothly, here are a few best practices to keep in mind:
- Always back up your code and data.
- Test your system thoroughly before deploying it.
- Keep your software and firmware up to date.
- Follow security best practices to protect your devices and data.
By following these tips, you'll minimize the risk of errors and ensure your projects are reliable and secure.
Conclusion: Your Journey into IoT Awaits
Well, there you have it—your ultimate guide to building IoT projects with a remote IoT platform and Raspberry Pi. We've covered everything from the basics of remote IoT platforms to advanced integration techniques and project ideas. By now, you should have a solid understanding of how these technologies work together to bring your ideas to life.
But remember, learning IoT is a journey, not a destination. The more you experiment and explore, the more you'll grow as a developer. So, don't be afraid to try new things, make mistakes, and learn from them.
Before we wrap up, here's a quick recap of what we've discussed:
- Remote IoT platforms provide a powerful way to manage and control devices over the internet.
- Raspberry Pi is an affordable and versatile device for IoT projects.
- Integrating Raspberry Pi with a remote IoT platform opens up endless possibilities for innovation.
Now, it's your turn to take action. Start building your projects, share your experiences, and inspire others to join the IoT revolution. And who knows? You might just become the next IoT guru!
Table of Contents
- What Exactly is a RemoteIoT Platform?
- Why Choose a Free RemoteIoT Platform?
- Raspberry Pi: The Heart of Your IoT Projects
- Setting Up Raspberry Pi for IoT
- Integrating Raspberry Pi with RemoteIoT Platforms
- Project Ideas for RemoteIoT and Raspberry Pi
- Building a Smart Home Automation System
- Troubleshooting Common Issues
- Best Practices for IoT Projects
- Conclusion: Your Journey into IoT Awaits


